The origins of steampunk come from early renderings of what the people from the industrial era imagined the future would be like. This style is basically a combination of the aesthetics of the industrial revolution with a futuristic, fantasy, or alternate history vibe. Before drawing a piece of steampunk art, it is important to understand the different motifs that are associated with this genre. Blimps, hot air balloons, masks, goggles, pipes, old-fashioned gauges, gears, clocks with gears, steampunk characters, and all kinds of steampunk machines are hot subject matter when it comes to steampunk art.
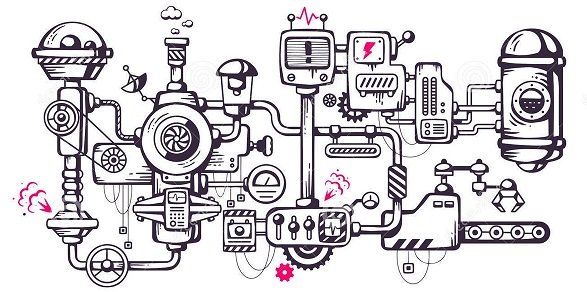
Steampunk machines incorporate many elements such as pipes, gears, gauges, pressure reading meters, turbines, metallic joints, steam chambers, and any other equipment used during the industrial era.
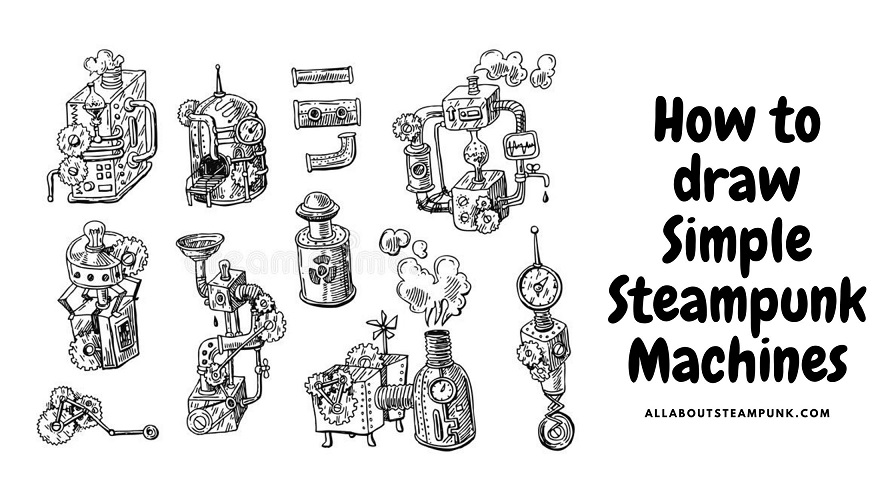
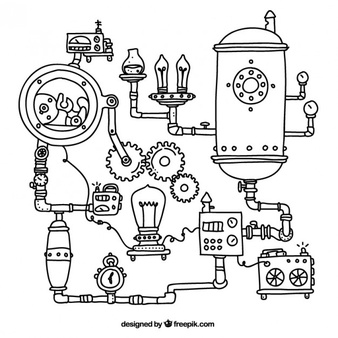
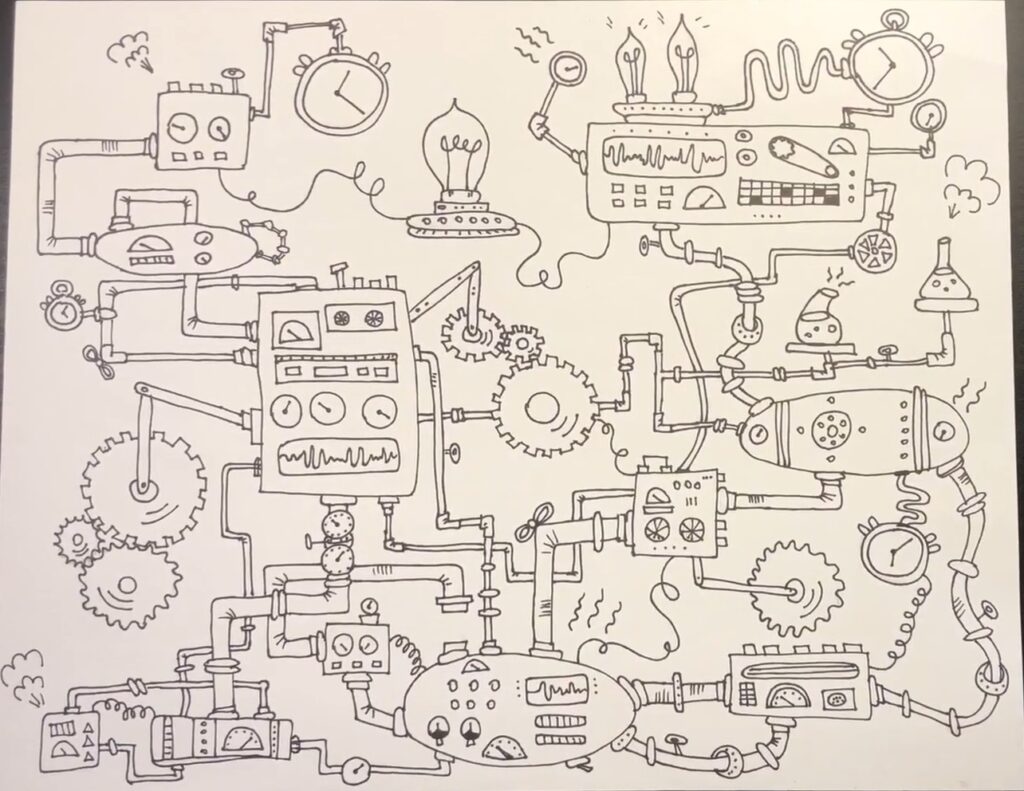
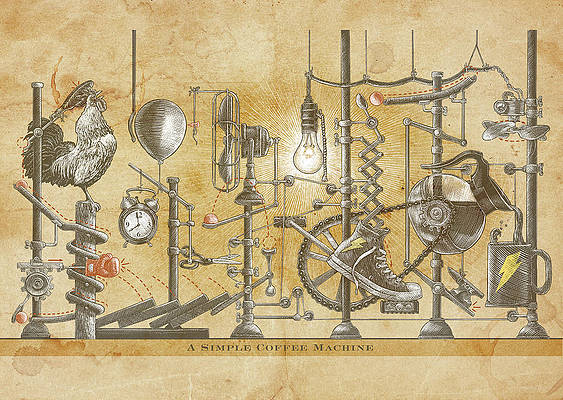
Here are some really cool two-dimensional drawings of simple steampunk machines. You can use these drawings to inspire your inner artist and create these designs using the step-by-step process mentioned below.

Contents
Step by step process to draw Steampunk machines
- Grab a large piece of paper and a pencil.
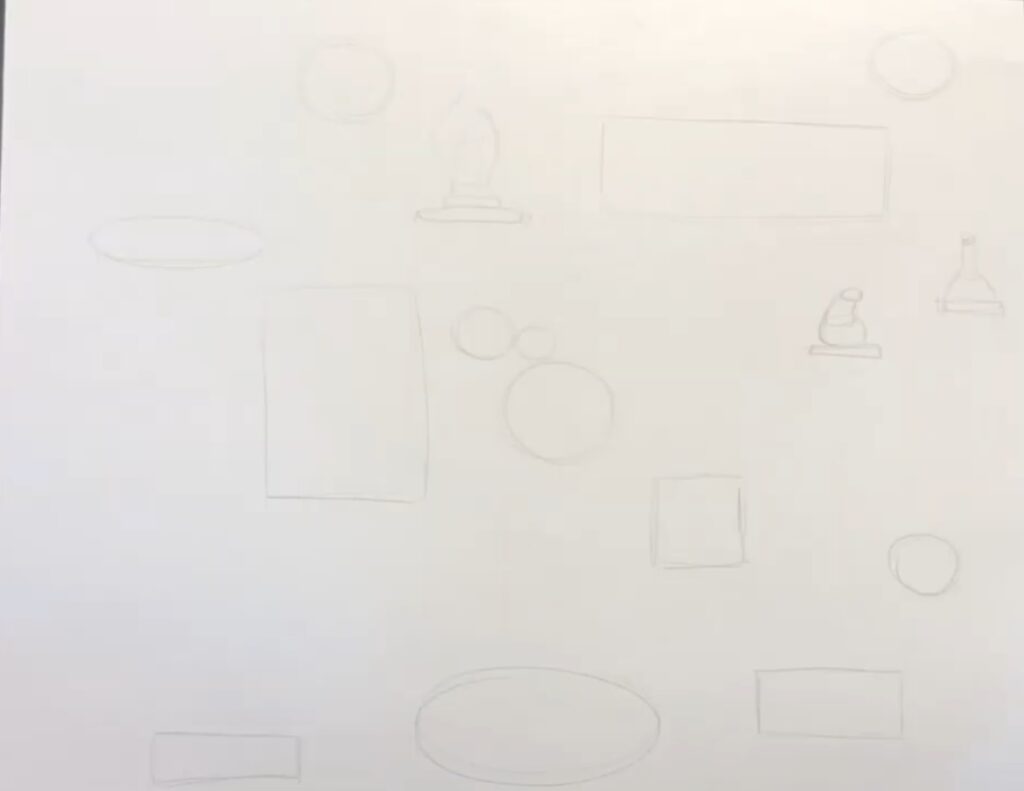
- Draw a couple of large rectangular shapes, then a couple of smaller rectangular shapes and a small square anywhere on the paper. These shapes will serve as chambers to read pressure and other readings of your steampunk design.
- Then add three small circles of different sizes anywhere on the paper. These circles will transform into gears in the later stages of the drawing.
- Keep adding circles randomly on different parts of the paper. These circles will later turn in gears and gauges.
- Draw small rectangular platforms and oval platforms to hold beakers and antique light bulbs.
- Your drawing should resemble something like this.
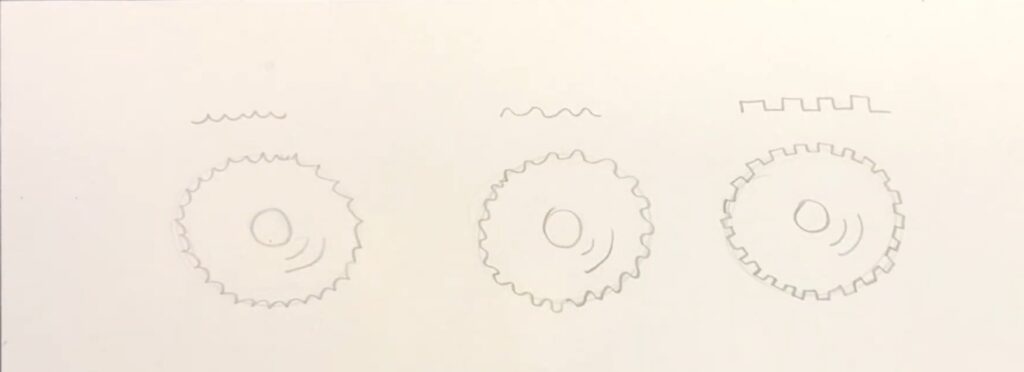
How to draw gears
There are usually three types of gear designs which you can see in the drawings of steampunk machines.
- Pointy gears: Made by drawing pointy half loops around a circular shape.
- Wavy gears: Made by drawing a wavy undulated line around a circular shape.
- Rectangular gears: Made by drawing rectangular indentations around a circular shape.
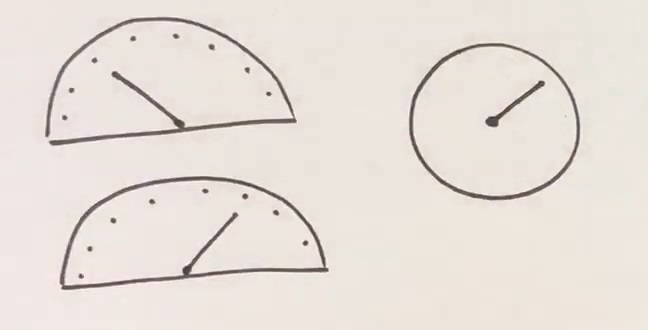
How to draw gauges
Now we will learn to draw gauges that will measure things like pressure and temperature in your drawing. There are usually two types of gauges.
- The first one is drawn using a semi-circular shape with a pointy needle at its center.
- The second one is drawn using a circular shape again with a pointy needle at its center.
You can also draw small dots along the diameter of the circular shapes to represent the different measuring points.
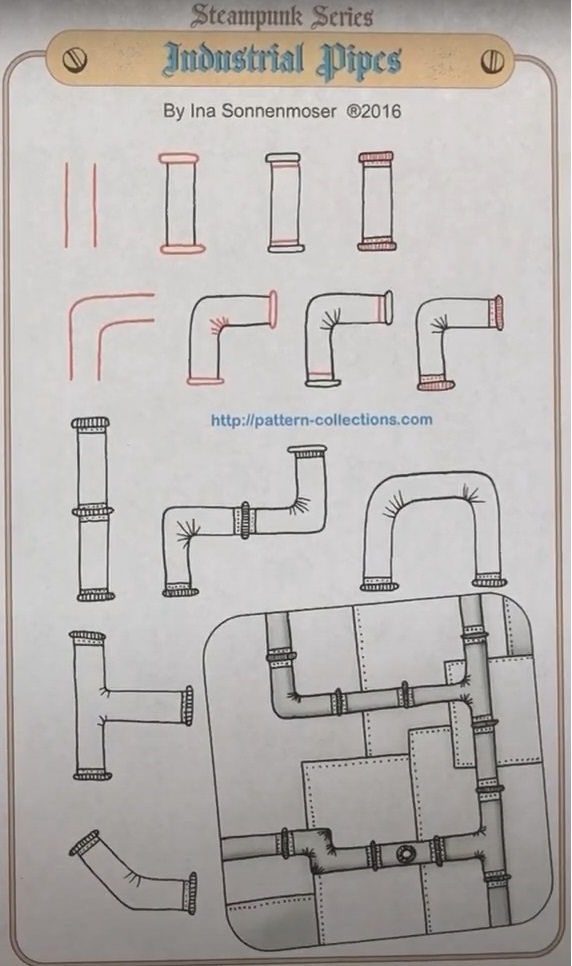
How to draw industrial pipes
You can draw your pipes in segments using parallel lines and then closing them off with oval shapes at the top and bottom. You can also draw a curved segment of your pipes. This can be achieved by drawing two parallel L-shaped lines and again closing the mouth of the pipe on both ends. You can also add a couple of lines where the elbow of the pipe bends. You can also combine multiple segments to draw different shapes such as zigzag, T-shaped pipes, U-shaped, or any other shapes you desire.
Step by step process to draw Steampunk machines cont.
7. Draw industrial pipes to connect the different shapes in your drawing.
8. If there is a lot of empty space in your drawing, you can fill it up with different shapes such as circles, ovals, and squares.
9. You can also draw the pipes overlapping with each other to connect the different shapes.
10. You can also draw curling cords and electric wires to connect the different parts of your machine.
11. Once all the different shapes in your drawing are connected using pipes, you can start adding extra details to your shapes. Add instruments such as switches, gauges, bolts, buttons, knobs, levers, and other interesting details to the various shapes in your drawing.
12. Use your imagination to customize your steampunk machine using elements such as clocks, winding pipes, coils, and steam coming out of your machines, etc.
13. Once you are satisfied with your design you can outline the various shapes by using an ultra-fine Sharpie and erase the pencil outlines.
If you want to go the extra mile, you can also add metallic colors to your drawings to bring them to life. You can also create a story about your steampunk machine and share it with us. We will publish your artwork on our website and share it with the world.
Best example of sharing information on Steampunk .
Perfect for the old wise cat and
the wannabes
Thank you, i love everything about this place! Later.