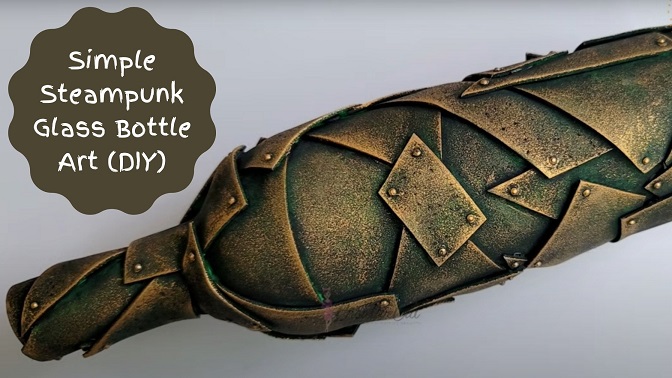
If you love art and crafts and if you are a fan of steampunk, this bottle art is one of the easiest to make. This bottle art would look great on a table as a steampunk décor or could be an accessory of a costume for a steampunk cosplay.
Materials Required:
- Glass Bottle or a Vase
- Glue
- Hot Super Glue/ Foam glue
- Paper Towel
- Foam Sheet
- Scissors
- Sponge
- Acrylic Paints
- Metallic Paints
- Paint Brush
- Small Beads or crystals
Step 1
Take some glue and mix it with water with a bit more glue than water. Apply the mixture on the entire glass bottle or vase.
Step 2
Use the paper towel to cover the entire glass bottle. Apply the water-glue mixture on top of the towel again to make sure it sticks properly to the water bottle. Keep it aside until it is completely dry.
Step 3
While the bottle is kept to dry, take a foam sheet and cut it into small pieces of random shapes and sizes depending on your preference. These can be squares, rectangles, triangles, etc. If you are 13 or below, make sure to have an adult supervising you while using scissors.
Step 4
Use foam glue or hot super glue to stick the pieces cut from the foam sheet on the bottle making sure no space is left on the bottle.
Step 5
When the glue on the foam has dried, stick one small bead or crystal on each edge of every foam strip stuck on the bottle. You can use protective gloves to avoid the glue sticking to your hands.
Step 6
Use the black acrylic paint to paint the entire surface of the bottle.
Step 7
Use a piece of sponge to gently apply metallic paint on the surface of the bottle. You can stick a pencil or a piece of stick at the end of the sponge to make the job easier.
All you need now is to let the paint dry, and you have created an amazing piece of steampunk bottle art which you use as a décor or as a gift for a friend.
Here is a brief tutorial by Creative Cat, that will walk you through the process of creating this bottle art.